Steps for Setup Google Calendar API Developer Account and get the .JSON file.
1. Open this link “https://console.developers.google.com” into your web browser.
2. Login with your existing google account OR create a new one then login.
3. After successfully login you go to the dashboard page and here you can see these options which is shown in below screen.
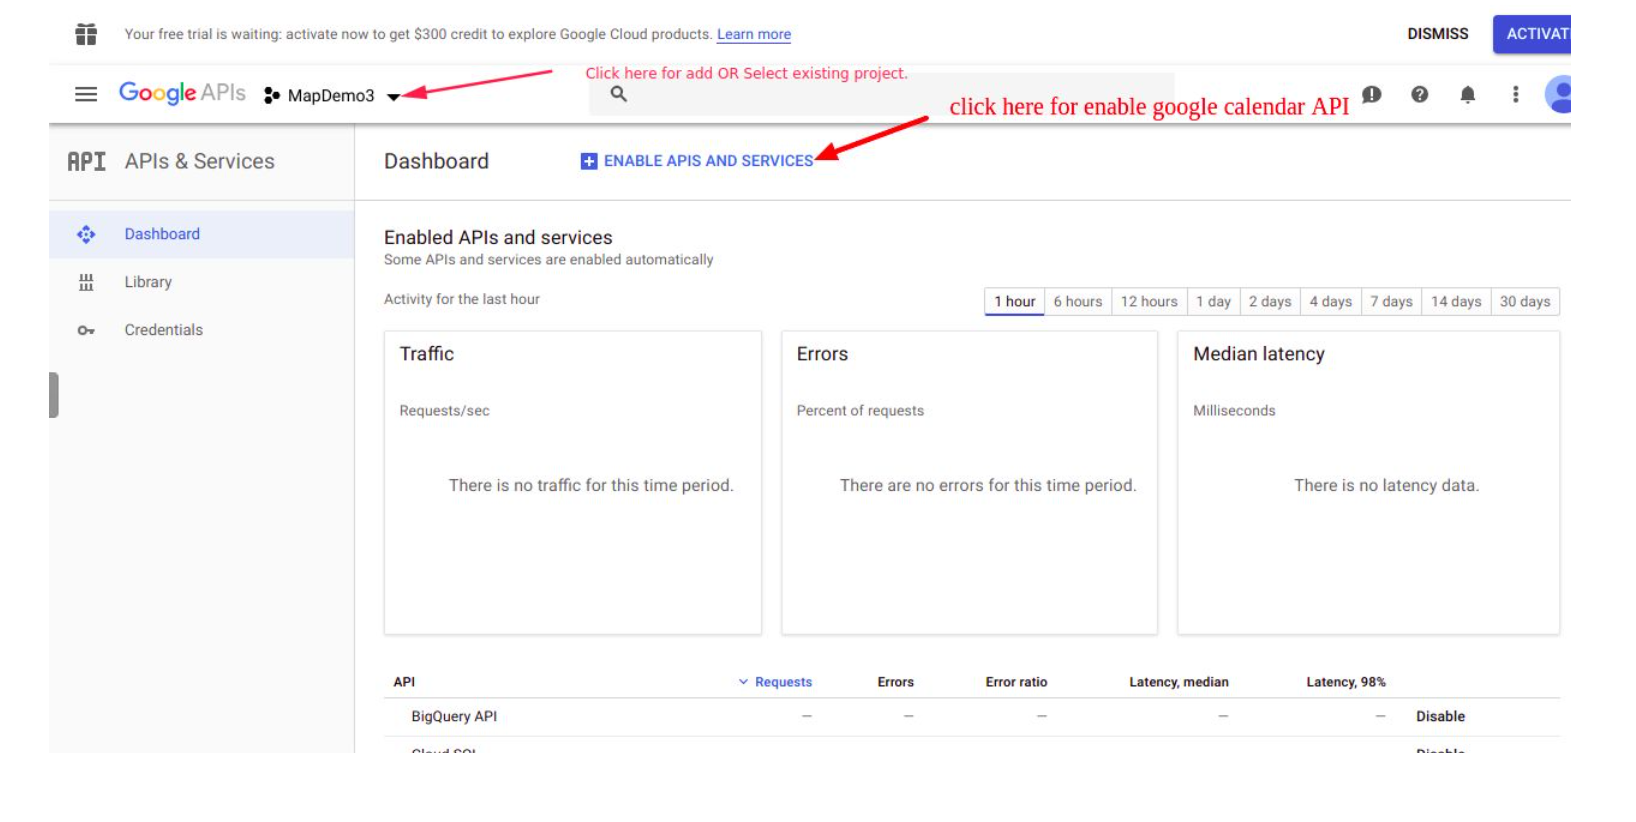
4. Google automatically create one demo project for you after login, but if you want to create new then you can click on above dropdown and select existing or create a new one.

5. After selecting project you need to enable API and Services, so you need to click button “ENABLE APIs and Services” available on dashboard page after that you will redirect to the API Library page.


7. Click on “Google Calendar API” and then Enable it.

8. Go to Dashboard again and then click Credentials links for add oAuth Credentials

9. click on create Credentials dropdown and select OAuth client ID from dropdown.

then click on OAuth client ID from dropdown.

10. You must select select Application type is “Web application” also you must enter authorize redirect URIs, with your domain .
Your domain + appointment/provider/getcode For example: If your domain url is
then you need to add redirect URL like this
You can find your domain url in your gappsy account. It's your webapp url.

11. Now OAuth client ID is successfully setup with API, Now you can download .JSON file from here.


Steps which needs to enable Google Calendar in Appointment Module’
1. Rename the downloaded json file to “client_secret” .
2. Add Google Json File from G Calendar Option provided in Appointment

NOTE: The Provider email needs to be different (Not API developer account email) and that the developers account email session cannot be open on the same browser.
In Providers Tab you can find the Google Calendar creation buttons which is only available for valid gmail account.

3. After click on Assign you will see the Google Calendar Option.

4. After clicks on Add Google Calendar button a child window open for authentication for google account of provider.

5. After enter valid details one other child window open where google ask for permission.

Note : If Child window not open then you must need to allow pop ups into your browsers. Like this

6. Now Calendar created on Google Calendar with “Provider Name + App Name”
7. Now you can book any appointment for this provider using the Appointment App it will automatically assign to this calendar and notify to the user.
8. Now you can see the event (Appointment details) details into your google account.